API Tokens
Page summary:
API tokens provide scoped authentication for REST and GraphQL requests without exposing user credentials. This documentation explains token types, creation, expiration, and secure usage within the admin panel.
API tokens allow users to authenticate REST and GraphQL API queries (see APIs introduction).
Prefer read‑only tokens for public access, scope server tokens to only what you need, rotate long‑lived tokens, and store them in a secrets manager. Never expose admin tokens in client‑side code.
Free feature
Minimum "Access the API tokens settings page" in Roles > Settings - API tokens
Available by default
Available in both Development & Production environment
Configuration
Most configuration options for API tokens are available in the admin panel, and your Strapi project's code can be used to alter how API tokens are generated.
Admin panel settings
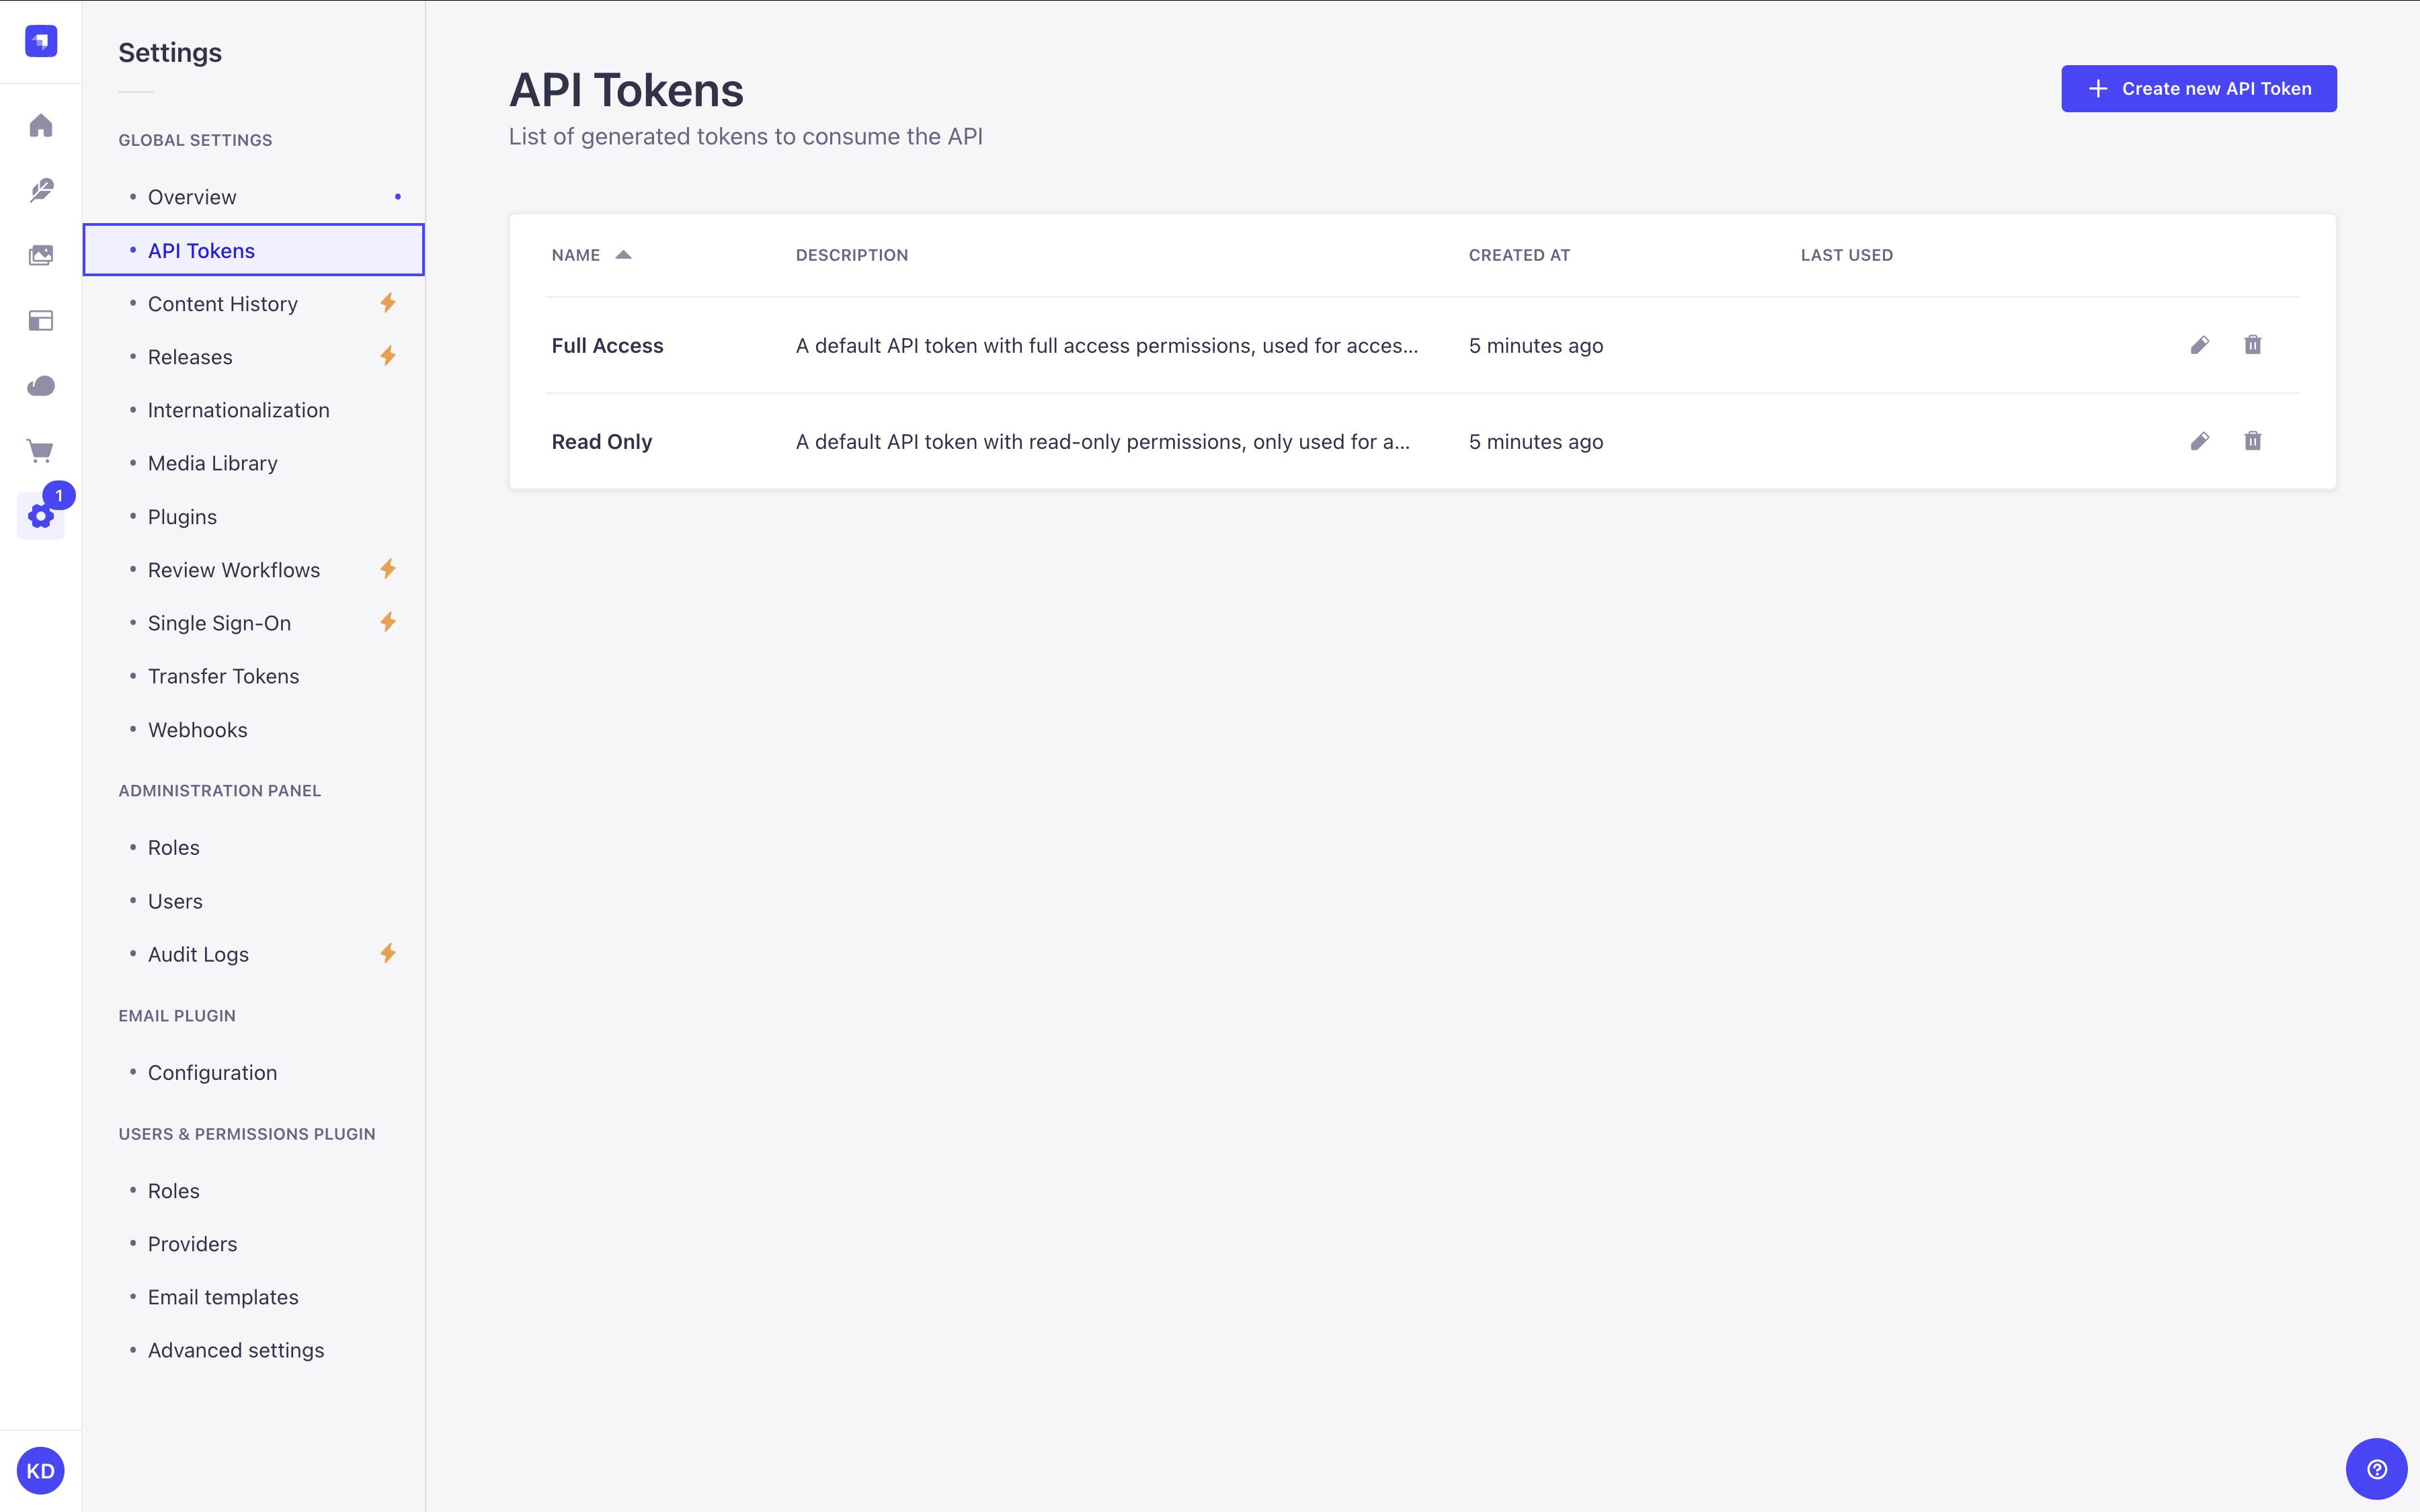
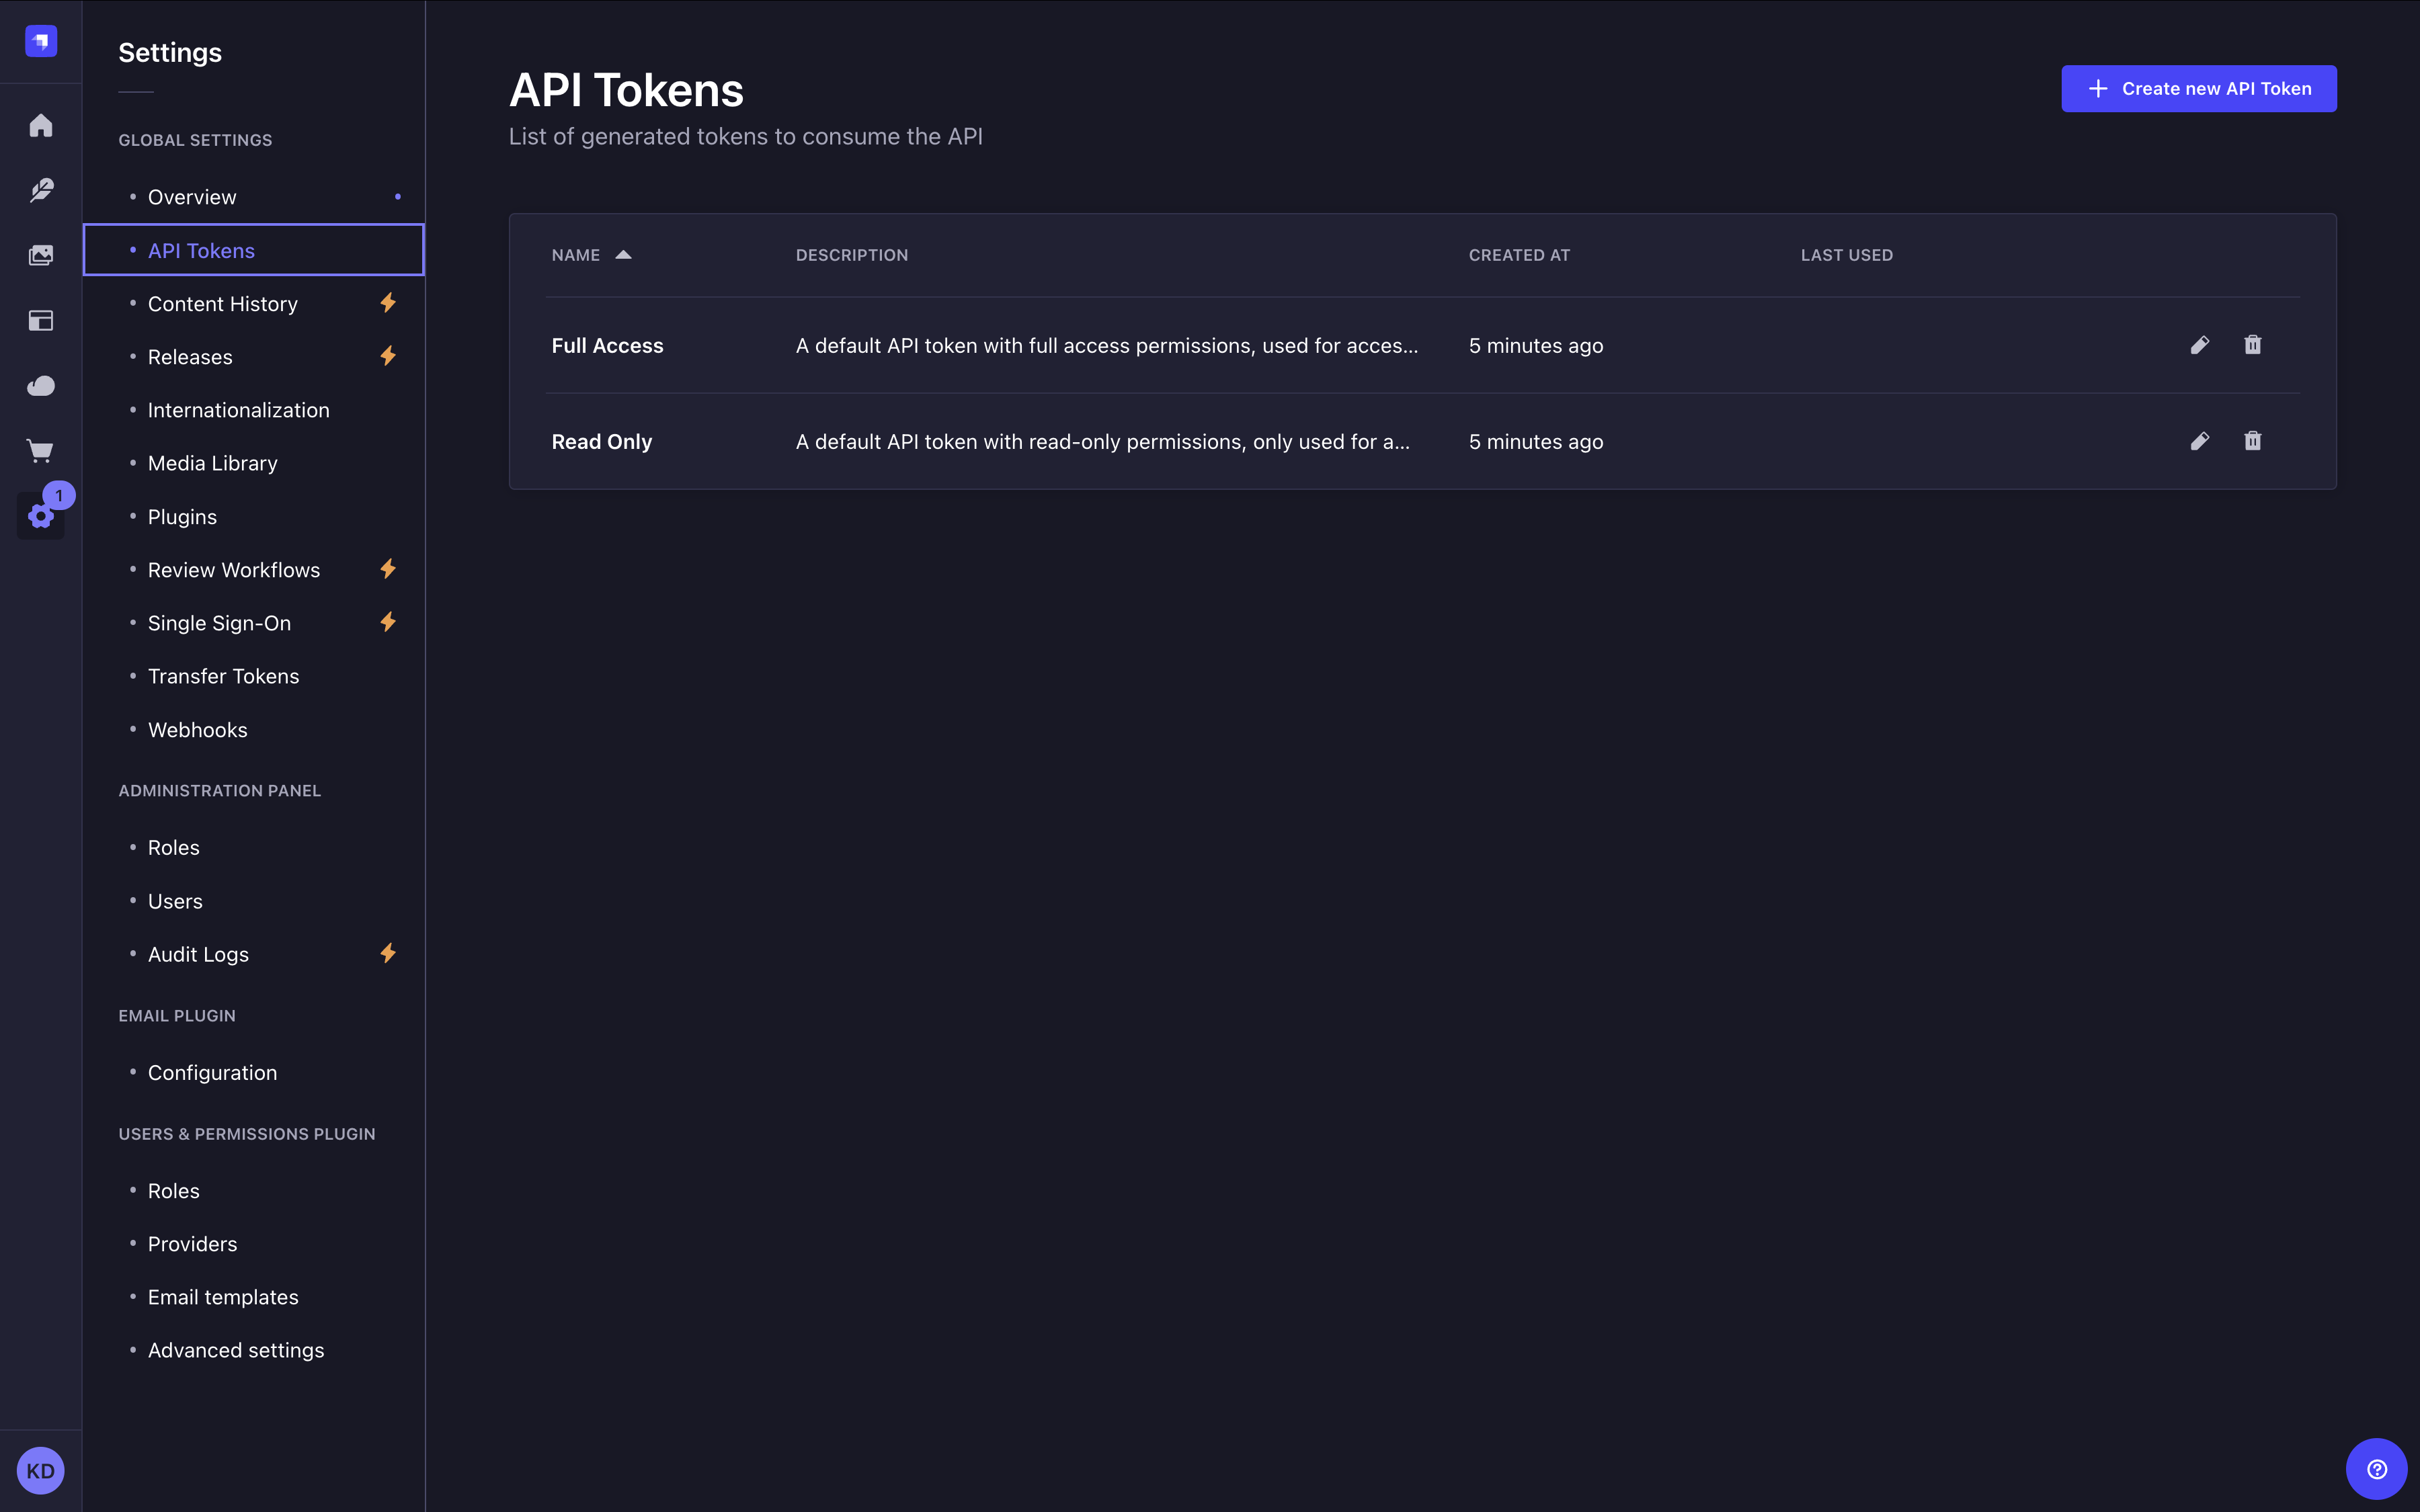
Path to configure the feature: Settings > Global settings > API Tokens
The API Tokens interface displays a table listing all of the created content-api tokens. For admin tokens, use the dedicated Admin Tokens page at Settings > Global settings > Admin Tokens.
The two pages are separate interfaces: API Tokens shows only content-api tokens (unchanged behavior), and Admin Tokens shows only admin tokens with an Owner column.
From there, you have the possibility to:
- click on the to edit an API token's name, description, type, duration or regenerate the token.
- click on the to delete an API token.
Strapi pre-generates 2 API tokens for you, a Full access one and a Read-only one. Since tokens can be only seen once without encryption configured, you may want to regenerate them after setting up an encryption key to make them permanently viewable.
Creating a new API token
- Click on the Create new API Token button.
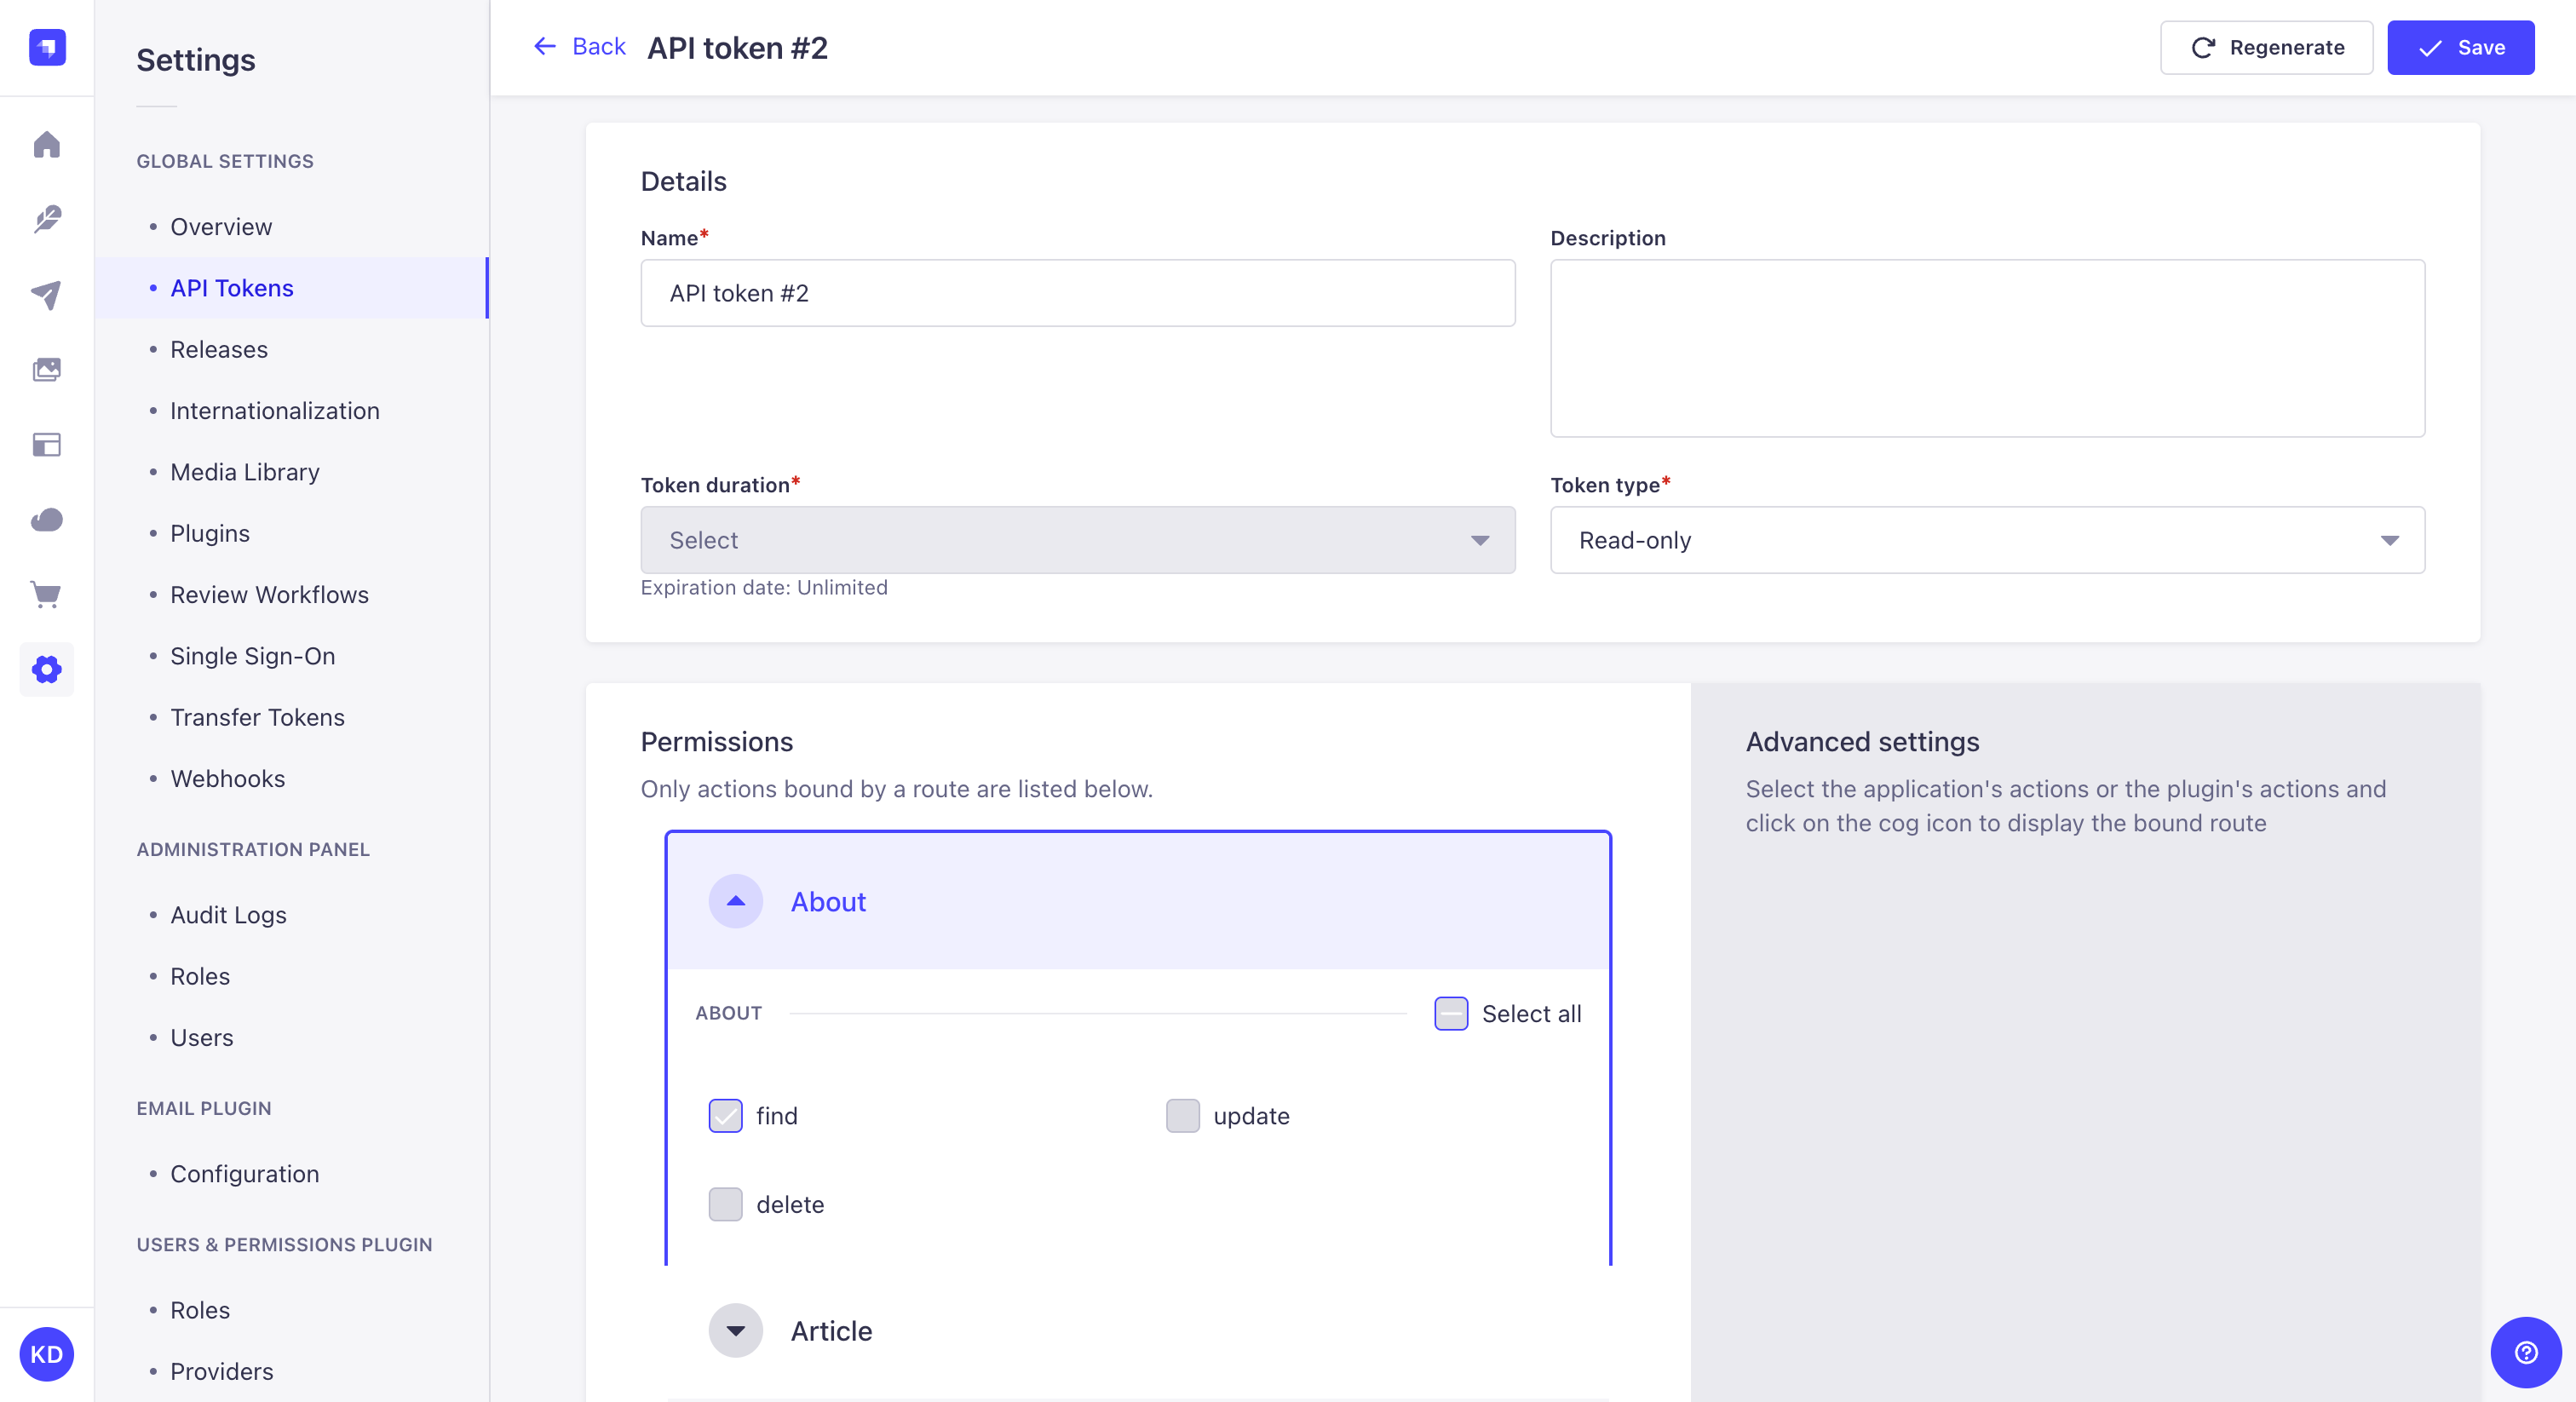
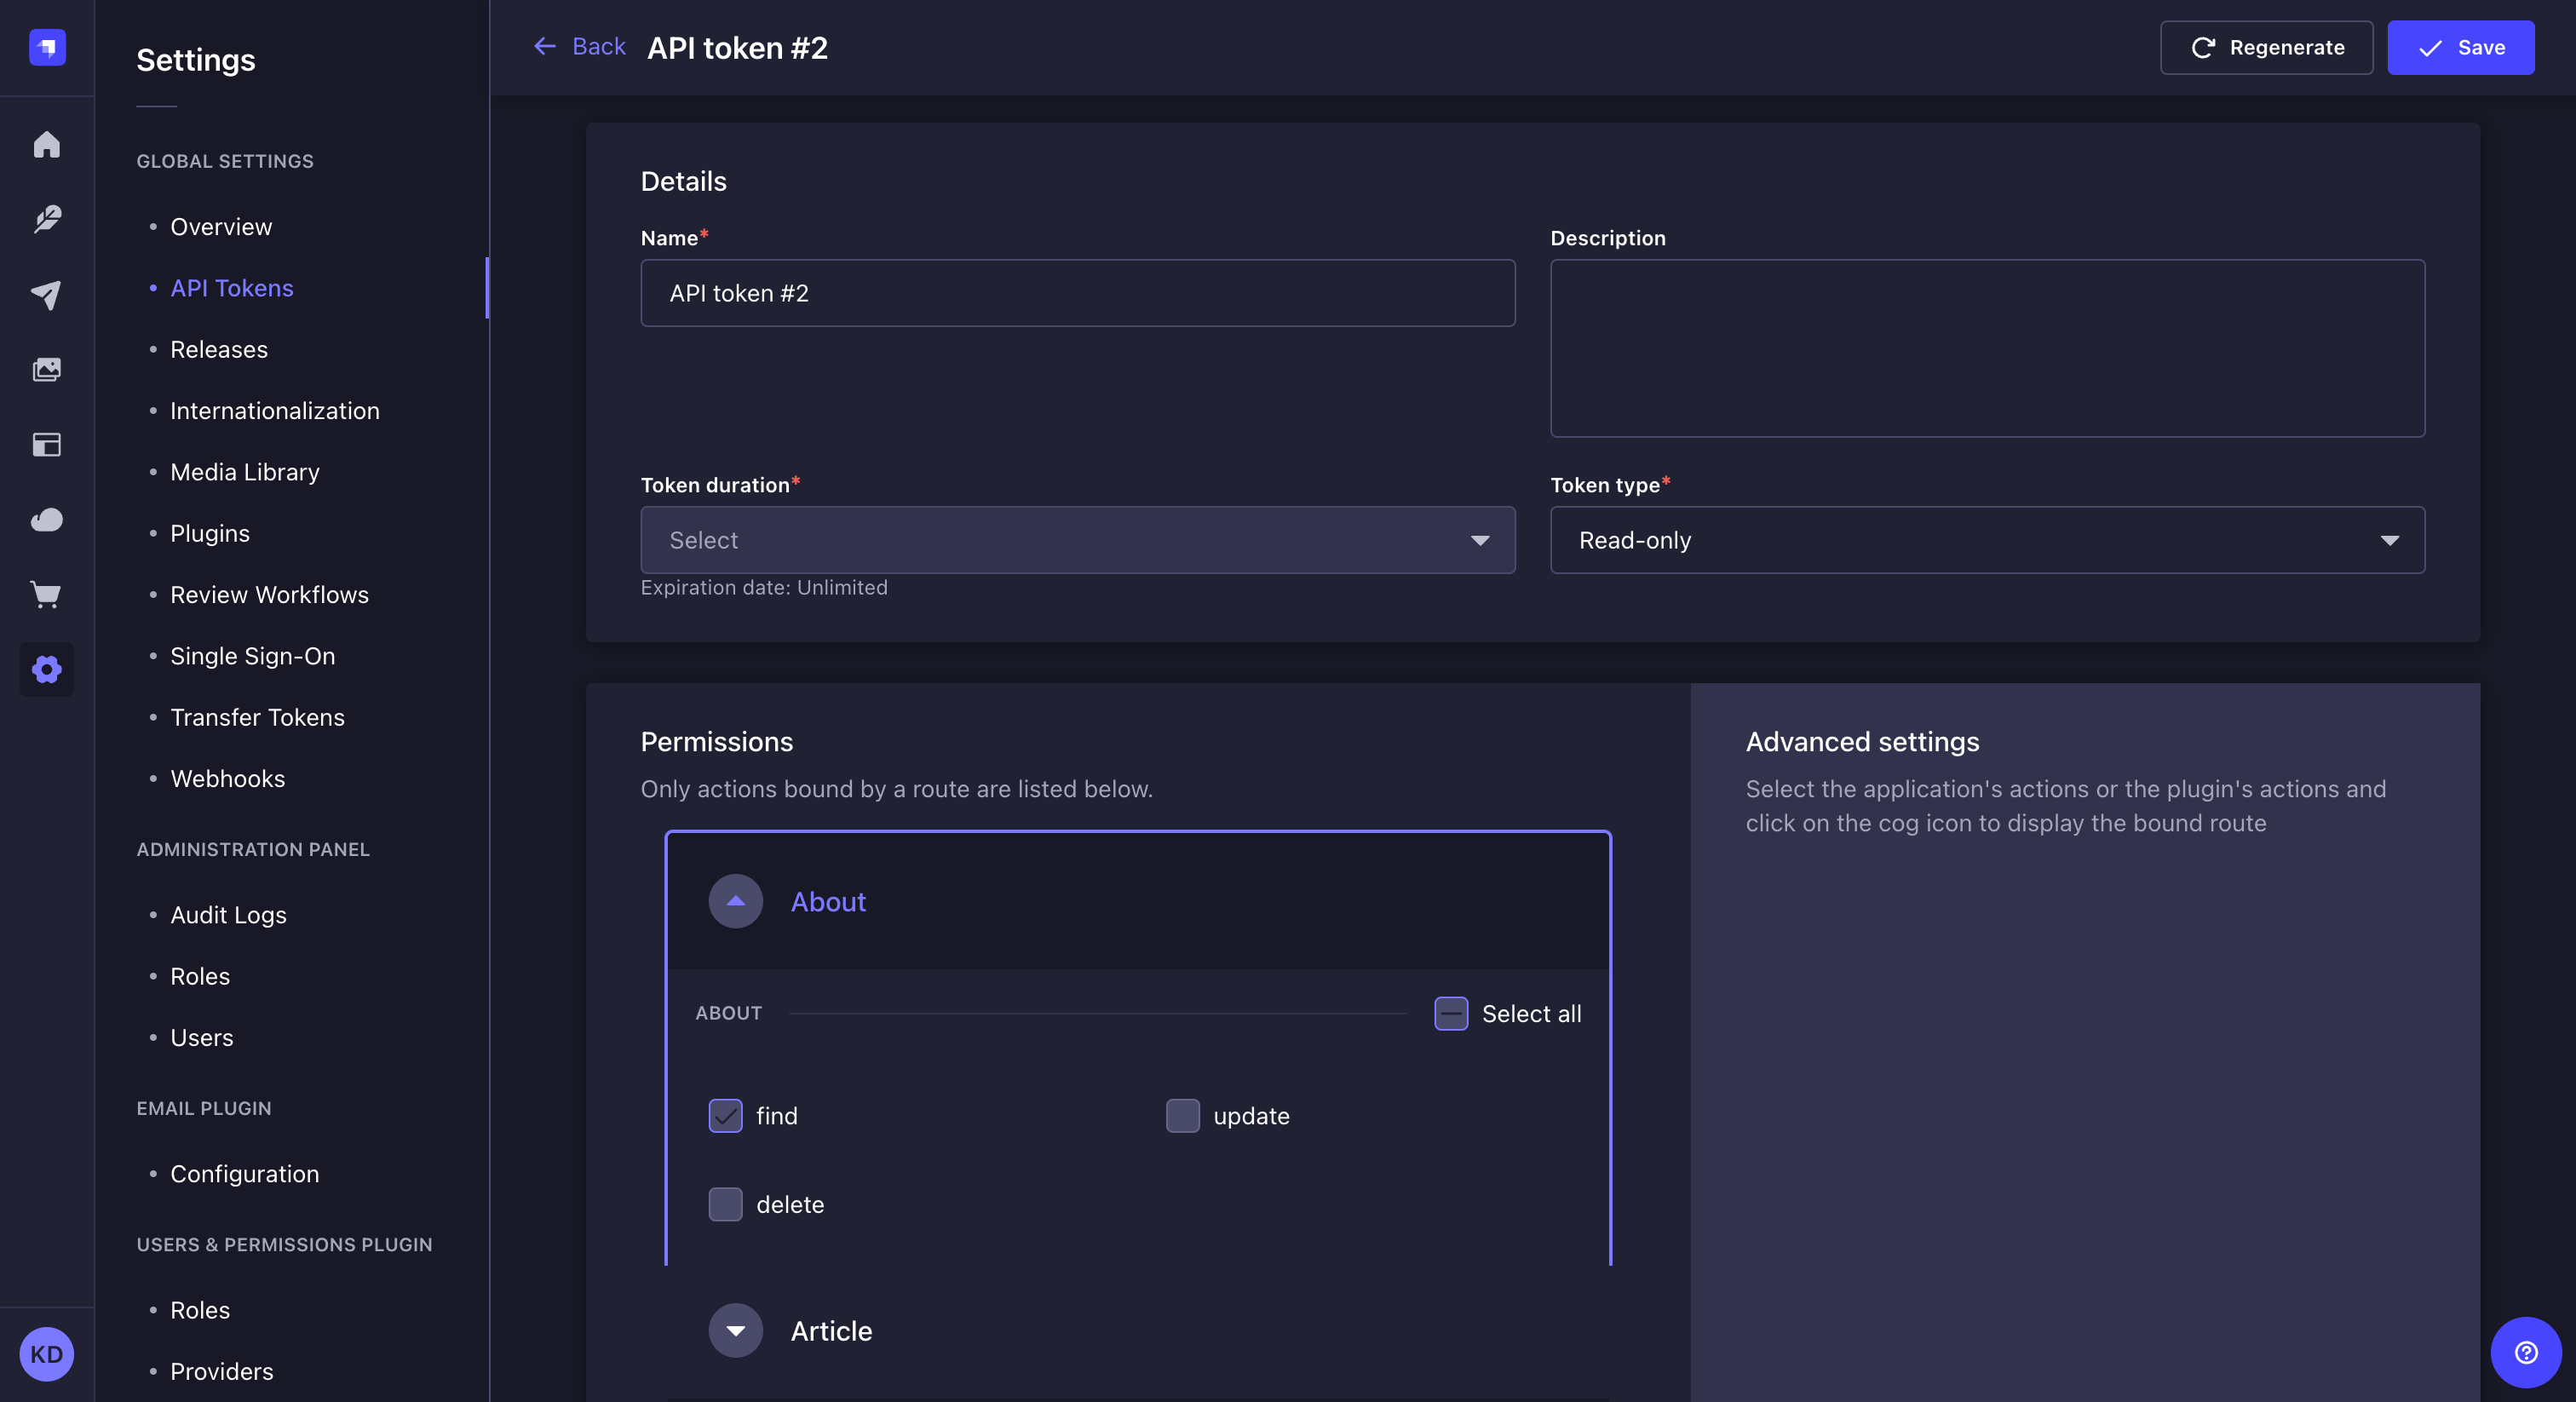
- In the API token edition interface, configure the new API token:
Setting name Instructions Name Write the name of the API token. Description (optional) Write a description for the API token. Token duration Choose a token duration: 7 days, 30 days, 90 days, or Unlimited. Token type Choose a token type: Read-only, Full access, or Custom. - (optional) For the Custom token type, define specific permissions for your API endpoints by clicking on the content-type name and using checkboxes to enable or disable permissions.
- Click on the Save button. The new API token will be displayed at the top of the interface, along with a copy button .
If an encryption key is configured in your Strapi project (admin.secrets.encryptionKey), the newly created and regenerated API tokens will be viewable at any time in the admin panel.
If no encryption key is set, tokens will only be viewable once, immediately after creation or regeneration.
Regenerating an API token
- Click on the API token's edit button.
- Click on the Regenerate button.
- Click on the Regenerate button to confirm in the dialog.
- Copy the new API token displayed at the top of the interface.
Code-based configuration
New API tokens are generated using a salt. This salt is automatically generated by Strapi and stored in environment variables (the .env file) as API_TOKEN_SALT.
The salt can be customized:
- either by updating the string value for
apiToken.saltin your/config/adminfile - or by creating an
API_TOKEN_SALTenvironment variable in the.envfile of the project
Changing the salt invalidates all the existing API tokens.
Ensuring API tokens are visible in the admin panel
To allow persistent visibility of API tokens in the admin panel, an encryption key must be provided in your /config/admin file under secrets.encryptionKey:
- JavaScript
- TypeScript
module.exports = ({ env }) => ({
  // other config parameters
  secrets: {
    encryptionKey: env('ENCRYPTION_KEY'),
  }
});
export default ({ env }) => ({
  // other config parameters
  secrets: {
    encryptionKey: env('ENCRYPTION_KEY'),
  }
});
This key is used to encrypt and decrypt token values. Without this key, tokens remain usable, but will not be viewable after initial display. New Strapi projects will have this key automatically generated.
Admin tokens
API tokens come in two permanent, purpose-built kinds: content-api and admin. Content-api tokens are the existing model — they authenticate against content API routes (REST and GraphQL) and work exactly as before. Admin tokens are a new kind designed for automation workflows that need to call the Strapi Admin API programmatically.
The two kinds serve distinct use cases:
- Use content-api tokens for external integrations: CDN cache invalidation, static site generators, and third-party services calling the public REST or GraphQL API.
- Use admin tokens for admin automation: MCP agents, CI/CD pipelines, and scripts that need to create, update, or delete content through the Admin API.
The two kinds are strictly separated. An admin token is rejected on content-api routes, and a content-api token is rejected on admin routes. An agent that needs access to both route types requires two tokens: one content-api token and one admin token.
Ownership
Every admin token is owned by a specific admin user. By default, the owner is the user who created the token. Ownership is immutable — it cannot be transferred after creation.
Ownership has three practical effects:
-
List visibility: Non-super-admin users see only content-api tokens and their own admin tokens in the tokens list. Super-admins see all tokens. Neither role receives the plaintext key (
accessKey) in list results — it is never included there. -
Key access: Who can view the plaintext token key depends on the token kind:
Token kind Who can view the key adminToken owner only. Even a super-admin cannot read another user's key — this restriction is intentional and cannot be overridden. content-apiAny user with the appropriate route permission. -
Permission ceiling: The token's permissions are bounded by the owner's effective permissions at all times (see Permission ceiling).
If the token owner's account is deleted, all admin tokens owned by that user are automatically deleted along with their associated permissions. There is no recovery path. To avoid losing access to active integrations, rotate and replace admin tokens before offboarding a team member who owns them.
If the token owner's account is deactivated (isActive === false) or blocked (blocked === true), any request authenticated with that owner's admin token returns 401 Token owner is deactivated. The token itself is not deleted — re-activating or unblocking the owner restores token functionality.
Permission ceiling
An admin token can never hold more permissions than its owner currently has. When a token is created or updated, the requested permissions are validated against the owner's effective permissions — the union of all permissions granted by the owner's roles.
Three rules apply:
- Action and subject must match. A token cannot be granted a permission the owner does not hold. If the owner does not have
deleteonapi::article.article, no token owned by that user can have it either. - Field scope must be a subset. If the owner's permission for an action and content type is scoped to specific fields (for example, only
titleandslug), the token can request at most those same fields. If the owner's permission has no field restrictions, the token may request any fields for that action and content type. - Conditions are inherited, not chosen. If the owner's role applies conditions to a permission (for example, "only records I created"), those conditions are automatically applied to the token and cannot be removed or relaxed.
Super-admins have no permission ceiling of their own. However, when a super-admin edits a token owned by another user, the ceiling is still enforced against the token owner's scope — not the super-admin's unrestricted access.
Any permission that exceeds the owner's ceiling is rejected at creation time with a validation error that lists the out-of-scope action, subject, and fields.
For more on how admin roles and permissions work, see Role-Based Access Control (RBAC).
Role-change synchronization
Token permissions are automatically reconciled whenever the owner's effective permissions change. This ensures tokens can never silently retain access that the owner no longer holds.
Reconciliation is triggered by three events, and a fourth event causes full token removal:
- A role's permission set is updated (an action is added or removed from a role).
- A user's role assignments change (a role is added to or removed from the user).
- A role is deleted.
- The token owner's account is deleted. In this case, all admin tokens owned by that user are deleted entirely, not re-clamped. See Ownership for details.
When reconciliation runs, it applies conservative rules. Permissions that exceed the owner's new ceiling are deleted. Conditions are updated to match the owner's inherited conditions. Permissions that remain valid are left untouched. For users with multiple roles, a permission shared by a role the user still holds is preserved.
Creating an admin token
Path to configure the feature: Settings > Global settings > Admin Tokens
-
Click on the Create new API Token button.
-
In the token creation form, configure the new admin token:
Setting name Instructions Name Write the name of the token. Description (optional) Write a description for the token. Token duration Choose a duration: 7 days, 30 days, 90 days, or Unlimited. Kind Select Admin. This field cannot be changed after creation. Permissions Use the permissions matrix to select which admin actions this token can perform. Permissions the current user does not hold appear disabled and cannot be selected. -
Review the inherited conditions displayed in the permissions matrix. Conditions applied to the owner's role permissions are shown as read-only — they apply automatically to the token.
-
Click Save. The token key is displayed once at the top of the interface.
The Kind field is set at creation time and cannot be changed. To switch a token from content-api to admin or vice versa, delete the existing token and create a new one.
The plaintext token key is shown only once, immediately after creation or regeneration. If an encryptionKey is configured in your project (see code-based configuration), the key remains viewable at any time in the admin panel.
Managing admin tokens
Admin tokens have a dedicated settings page, separate from content-api tokens. The two pages are independent interfaces, not filtered views of a shared list:
- Settings > Global settings > API Tokens — shows only
content-apitokens. Unchanged from previous behavior; no Owner column. - Settings > Global settings > Admin Tokens — shows only
admintokens. Has its own CRUD routes (admin::admin-tokens.*RBAC actions) and an Owner column displaying the display name of each token's owner.
The following restrictions apply on the Admin Tokens page:
- The Regenerate button is only visible to the token's owner. Other users, including super-admins, do not see this button for tokens they do not own.
- The token can only be edited by its owner or a super-admin.
- The token can only be deleted by its owner or a super-admin.
When a super-admin views an admin token owned by another user, a read-only Owner field appears in the token details panel. The permissions matrix shows only the checkboxes within the token owner's scope — not the super-admin's unrestricted access.
The owner's effective permissions are fetched via GET /admin/api-tokens/:id/owner-permissions. This endpoint is accessible by the token owner or a super-admin. It returns 400 Bad Request for content-api tokens.
Usage
Using API tokens allows executing a request on REST API or GraphQL API endpoints as an authenticated user.
API tokens can be helpful to give access to people or applications without managing a user account or changing anything in the Users & Permissions plugin.
When performing a request to Strapi's REST API, the API token should be added to the request's Authorization header with the following syntax: bearer your-api-token.
Read-only API tokens can only access the find and findOne functions.